Wednesday 23 May 2012

Today i finished my packaging..


I downloaded a template for the type of packaging I wanted, I chose a simple design with a slightly different shape to it to keep the actual shape still interesting. I chose other designs first but this was the one I decided on:

I printed out the plain design on A4 paper and folded it to see how it fits and what parts are still visible so I can design on them. The mock packaging is smaller than the one I have made actual size.
I imported the template into Adobe Photoshop CS5 and began to design within the outlines and fold lines making sure I opened up a new layer first. I started with the background which was black brick but two sides grey brick. I used a brick pattern brush tool and covered the whole template. I then copied as a new layer my drawing of a robot, that I edited before and my logo, I have two logos and two robots on my packaging to make it mostly symmetrical. I then added some text running down the side of the package saying an email address and ‘Made in Barnsley’ and I also added a barcode to make my design look more professional, this is the final design and layout for my packaging:
Wednesday 16 May 2012

Packaging Design

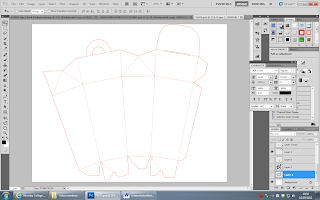
Today I have finished designing the packaging for some sunglasses. I first searched for appropriate packaging style then I downloaded the plan onto Adobe Photoshop CS5 and opened a new layer to start to design on. This is the plan I downloaded:


I then began to put a background onto it, added my logos, robot design an email address and a barcode.

Top Designs


I have been designing a few ideas for to print onto shirts, I will print the logo onto one as one of the designs. I have also sketched a robot and scanned it into my docs so I could edit it on photoshop.
This was the first copy of the drawing:


I then edited it, and added a brick background, this is my final idea for this shirt design:

Wednesday 9 May 2012

Logo

I sketched out a design for my logo and scanned it into the computer then edited it. I chose two different fonts and a border for it, my aim was to make it look like an old fashioned sign, quite plain but still interesting and cool. This is my final design; I will print it onto the products, as a shirt design, on the back or on the front as the main design. It will also go onto my poster and onto the packaging I will make.

Thursday 26 April 2012

Robot Emotions presentation


On Monday I presented my idea for my company ‘Robot Emotions’ to a focus group of 4 other people. I had made a PowerPoint Presentation to assist me. I had also made a few rough designs for my tops I will make and printed off some questionnaires for my classmates to answer to also help me decide on my final designs and colours I would use.

I feel confident with my presentation and I feel I got a good response from the people I presented my ideas to. They also helped me decide on my final ideas for my whole company.

I had been researching different types of packaging to gain more ideas for my own designs that i will be creating.

My company i am creating will be named 'Robot Emotions' or shortened down to 'ROB-EM'

I have chosen 3 different kinds of things to make for my company, they are;

-Two shirts designs


-A promotional poster

-A sunglasses case


I will design and create them all myself, they will be based on the style of modern vintage and incorporate the thought that robots 'have no emotions' but i will make the designs to show the opposite.

Monday 6 February 2012

Types of Print Infographic

For the last two lessons I have been designing and creating a Inforgaphic based in different types of printing. Including types of Hand printing, Mechanical printing and Digital printing. I created the Inforgaphic on Adobe Photoshop CS5.

Friday 27 January 2012

Today we finished off the groups final infographic and presented them to the rest of the class, summarising and showing key points. Making the infographic helped me understand how the information is presented and what colours and types of images to use.
The other groups presenting their inforgraphic also helped me gain more of an understanding what there topics was about and also gave me some ideas on presentation.

Infographics Research

The class was split into groups of 5 and we researched as a group different infographics so that we could get ideas for the one we made as a group.  We looked at the colour theories, page layout, image selection and what was best for our audience.

Research Techniques.

For this lesson we got into groups and went to the learning curve to research answers on a questionnaire via different methods of research. For example, the internet, general knowledge from myself and my peers and looking up information in books.

Thursday 12 January 2012

Initial proposal

I understand what I have to complete for Unit 3, 4 and 18. For unit 3 I have to do research techniques, unit 4 is production management. And for unit 18 I will design and make three or more different forms of print media, including a Shirt design and a form of packaging.