Wednesday 23 May 2012

Today i finished my packaging..


I downloaded a template for the type of packaging I wanted, I chose a simple design with a slightly different shape to it to keep the actual shape still interesting. I chose other designs first but this was the one I decided on:

I printed out the plain design on A4 paper and folded it to see how it fits and what parts are still visible so I can design on them. The mock packaging is smaller than the one I have made actual size.
I imported the template into Adobe Photoshop CS5 and began to design within the outlines and fold lines making sure I opened up a new layer first. I started with the background which was black brick but two sides grey brick. I used a brick pattern brush tool and covered the whole template. I then copied as a new layer my drawing of a robot, that I edited before and my logo, I have two logos and two robots on my packaging to make it mostly symmetrical. I then added some text running down the side of the package saying an email address and ‘Made in Barnsley’ and I also added a barcode to make my design look more professional, this is the final design and layout for my packaging:
Wednesday 16 May 2012

Packaging Design

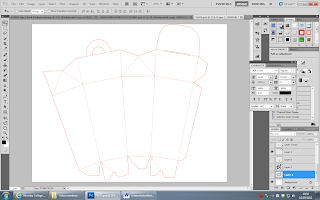
Today I have finished designing the packaging for some sunglasses. I first searched for appropriate packaging style then I downloaded the plan onto Adobe Photoshop CS5 and opened a new layer to start to design on. This is the plan I downloaded:


I then began to put a background onto it, added my logos, robot design an email address and a barcode.

Top Designs


I have been designing a few ideas for to print onto shirts, I will print the logo onto one as one of the designs. I have also sketched a robot and scanned it into my docs so I could edit it on photoshop.
This was the first copy of the drawing:


I then edited it, and added a brick background, this is my final idea for this shirt design:

Wednesday 9 May 2012

Logo

I sketched out a design for my logo and scanned it into the computer then edited it. I chose two different fonts and a border for it, my aim was to make it look like an old fashioned sign, quite plain but still interesting and cool. This is my final design; I will print it onto the products, as a shirt design, on the back or on the front as the main design. It will also go onto my poster and onto the packaging I will make.

Thursday 26 April 2012

Robot Emotions presentation


On Monday I presented my idea for my company ‘Robot Emotions’ to a focus group of 4 other people. I had made a PowerPoint Presentation to assist me. I had also made a few rough designs for my tops I will make and printed off some questionnaires for my classmates to answer to also help me decide on my final designs and colours I would use.

I feel confident with my presentation and I feel I got a good response from the people I presented my ideas to. They also helped me decide on my final ideas for my whole company.

I had been researching different types of packaging to gain more ideas for my own designs that i will be creating.

My company i am creating will be named 'Robot Emotions' or shortened down to 'ROB-EM'

I have chosen 3 different kinds of things to make for my company, they are;

-Two shirts designs


-A promotional poster

-A sunglasses case


I will design and create them all myself, they will be based on the style of modern vintage and incorporate the thought that robots 'have no emotions' but i will make the designs to show the opposite.

Monday 6 February 2012

Types of Print Infographic

For the last two lessons I have been designing and creating a Inforgaphic based in different types of printing. Including types of Hand printing, Mechanical printing and Digital printing. I created the Inforgaphic on Adobe Photoshop CS5.